![[TUTORIAL] MF Arcade Gameboy by Luna Kabetet](http://2.bp.blogspot.com/-IO-XEI1LgEs/VmPNKFp0BhI/AAAAAAAACOg/_JrYHMBXV5w/s260/nothumb.jpg "[TUTORIAL] MF Arcade Gameboy by Luna Kabetet")
Boa dia/tarde/noite lindos! Como estão?
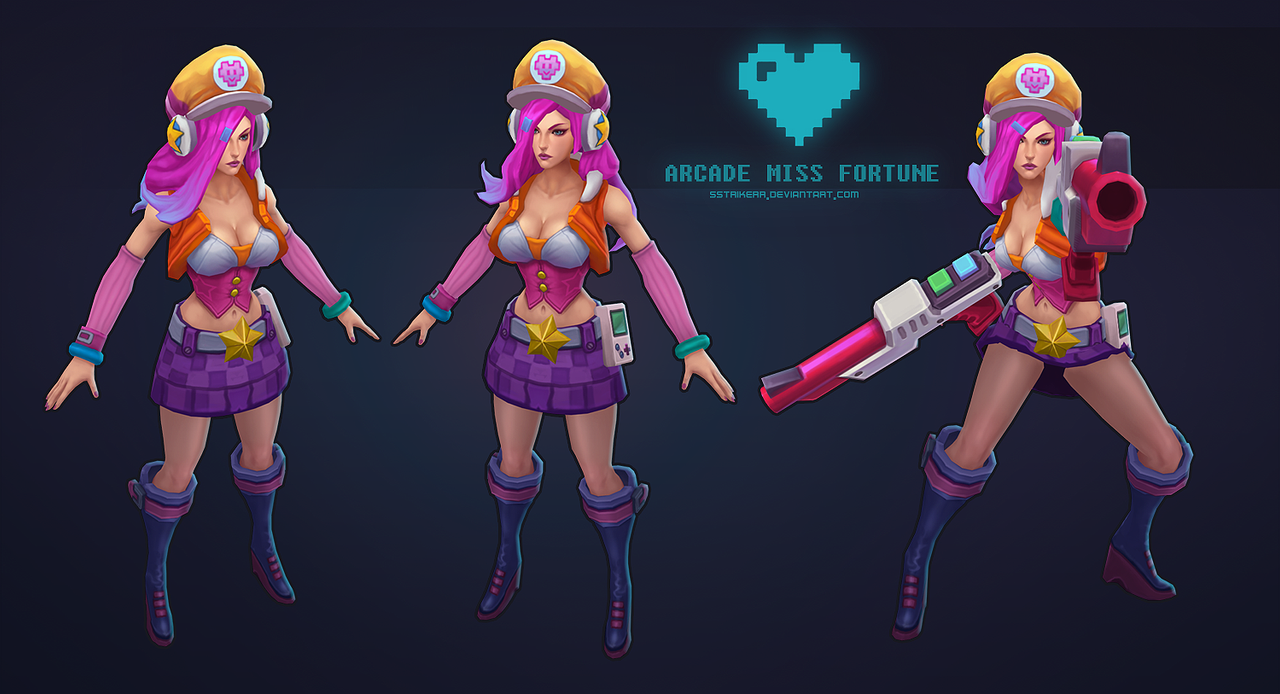
Bem, eu comecei a trabalhar no meu cosplay de Miss Fortune Arcade. Não conhecem?

No outro lado do cinto dela (o que não está visível na foto), ela tem um Gameboy. Como não vejo interesse em comprar um, resolvi fazer o meu, para o cosplay. Neste post, mostrarei os materiais que você precisará para fazer, e o passo-a-passo. Querem aprender? Só continuar lendo com a tia Luna! 

Good morning/afternoon/night beauties! How are you?
Well, I started to work in my Miss Fortune Arcade's cosplay. Don't you know? I posted the photo for you.
At the other side of hers belt (isn't visible in the picture), she has a Gameboy. As I see no interest in buying one for me, I decided to make my own. In this post, I will show the materials you need to do, and step-by-step. Are you want to learn? Just keep reading mt post!
MATERIAIS/MATERIALS
 Isopor/Styrofoam; Estilete/Stiletto; Massa corrida/Spackling; Lápis, caneta/Pencil, pen; Tintas branca, preta, azul, roxa e verde/White, back, blue, purble and green paints; Pincéis/Brushes; Folhas de E.V.A/E.V.A sheets; Cola forte/Strong glue.
STEP-BY-STEP
O1~ Desenhe no isopor o tamanho do Gameboy que você quer fazer. O meu tem de tamanho 11cm. Desenhei com um lápis somente a forma dele.
> Draw on the Styrofoam the Gameboy's size you want to do. My size is 11cm. I drew with a pencil only his form.
> Draw on the Styrofoam the Gameboy's size you want to do. My size is 11cm. I drew with a pencil only his form.
O2~ Com um estilete, corte o seu pedaço de isopor. Depois, arredonde as bordas com o estilete.
> With a stiletto, cut your piece of Styrofoam. Then, round the edges, giving a rounded shape to the piece.
> With a stiletto, cut your piece of Styrofoam. Then, round the edges, giving a rounded shape to the piece.
O3~ Em cima do pedaço de isopor, desenhe o esboço dos botões e da tela. Com este esboço, faça-os no E.V.A.
> On top of the Styrofoam, draw the outline of the buttons and the screen. With this outline, make them in E.V.A. Photo:


O4~ Enquanto você pinta os botões na cor certa, passe a massa na peça de isopor. Passe várias camadas e deixe secar pelo tempo necessário (leia a lata e se informe do tempo de secagem).
> While you paint the buttons in the right color, pass the dough in the piece of Styrofoam. Spend several layers and let dry long enough (read the can and let the drying time). Photo:


O5~ Quando a peça estiver totalmente seca, lixe-a! Deixe-a bem lisinha e, depois, passe camadas de tinta branca.
> When the piece is completely dry, paint it! Let it smooth and then pass layers of white paint.
O6~ Pinte o fundo preto do Gameboy na peça seca.
> Paint the black background of the Gameboy in the dry piece.
O7~ Faça a parte cinza dos botões com tinta (só misturar o branco e preto, não precisamos de tinta cinza, haha) e cole os botões já secos com uma cola bem firme! (Usei cova de EVA).
> Make gray paint for the buttons (just mix white and black, we do not need gray paint, haha), and paste buttons already dry with a strong glue! (I used EVA pit).

O8~ Finalize com verniz, e pronto! Seu Gameboy está finalizado.
> Finish with lacquer, and voilà! Your Gameboy is done.
More references:
Espero que eu tenha ajudado com o tutorial! Qualquer dúvida, podem entrar em contato comigo nas minhas redes sociais.
I hope I've helped with the tutorial! Any questions, contact me on my social networks.
Comentem o que acharam! Beijos da Luna!
Commens bellow! Kisses from Luna! <3


![[TUTORIAL] MF Arcade Gameboy by Luna Kabetet](https://lh3.googleusercontent.com/blogger_img_proxy/AEn0k_s6us_G0VE6Am8IkvYVn-1M_7T7baFDHCn8bGHEoDzeGatFk3ucug6gEs1vrIuYdHW49KsXInS5v8AAYJlMwIlUvpVx_KALH157Yc31R2KwscGW4PVAzAr6mvhoggqMbYi4dQSYovtIMNHceznSXp883mAHJAP1nOCHzSuXaJx-6y7fMqeFpQ=w72-h72-p-k-no-nu)
